My Perfect Apple Crumble

As we are in the middle of Bramley Apple Week, you knew that didn’t you, I wanted to give you a failsafe recipe for that most English of desserts the apple crumble, and you cannot make an apple crumble without a Bramley apple. In 1809 a Southwell* resident, Mary Ann Brailsford planted some apple pips one of which still bears fruit to this day. In 1846 her cottage and garden were sold to one Matthew Bramley and apart from shelling out the cash that is his total contribution. A local nurseryman admired the quality of the apples and asked to be allowed to take some grafts to develop more trees capable of producing the fruit. Matthew Bramley agreed to this on the condition that if the apples went on to any commercial success they would bear his name. The Bramley is now famous and cooks love it for its flavour and excellent cooking qualities. It remains one of the most widely grown British culinary apples.

Bramleys
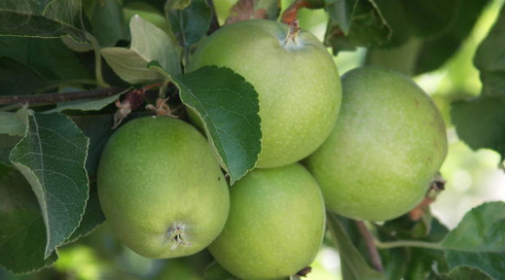
The crumble is a quick and easy pudding that can be adapted to suit the seasons and the different fruits available often partnering softer fruits with apples or pears and enhancing the flavour with the use of spices. Apple crumble is the most popular version of the dish and due to the keeping quality of apples traditionally a staple throughout long winters when very few fresh fruits were available. Apples such as Bramley’s would have been stored in a loft or attic to provide a valuable source of vitamin C from November to February. Today your apples are shipped into supermarkets from around the world to overcome seasonality.

However, if you want to go seasonal and reduce your carbon footprint here are a few ideas spring is when rhubarb comes into its own, I pre-bake mine with brown sugar, ginger orange juice, and zest to help keep the shape and prevent the crumble becoming soggy

During the summer there is an abundance of produce, tart gooseberries with plenty of sugar, cherries, or then raspberries, strawberries, and blackcurrants and that all liven up the last of the previous year’s apples when baked together. Spiced plums, pears, apples, and blackberries are the staples of autumn and on into winter.

2017-02-08 13.30.03

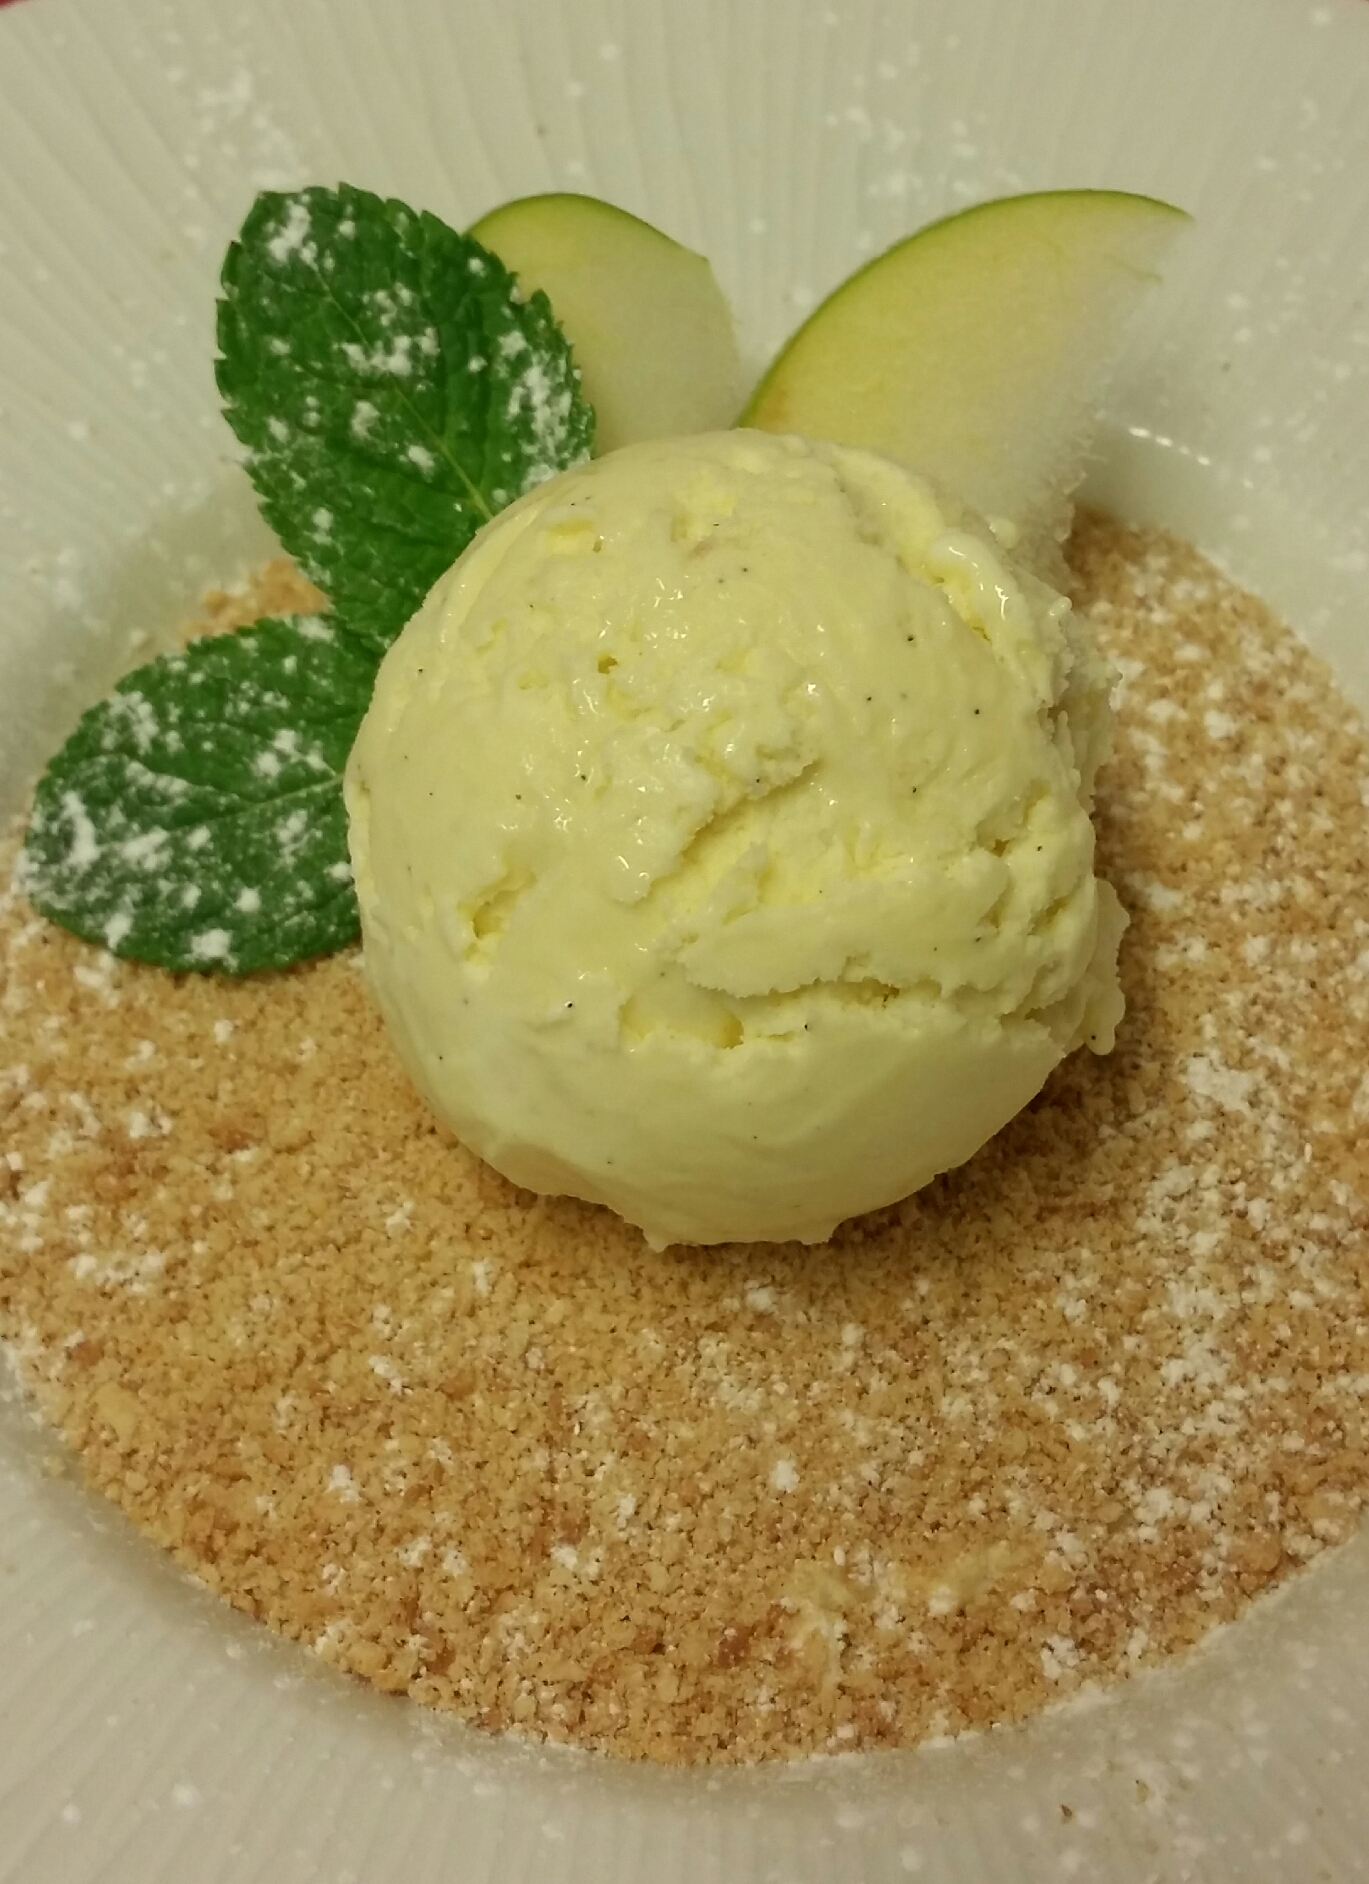
Crumbles are best enjoyed hot, with liberal dollops of custard, clotted cream or a scoop or two of ice cream. You can change the basic recipe for the crumble topping by mixing in oats or a sprinkling of chopped nuts and adding spices such as ginger, nutmeg, and cinnamon.

* Now in passing most people will know Southwell for its pretty minster and horse racing track but now you dear reader know Southwell is the home of the English Bramley cooking apple. The town holds an annual festival each October to celebrate the Bramley.


My Perfect Apple Crumble

1kg Bramley Apples

3 tablespoons of Apple Juice or water

2 tablespoons Caster Sugar ( approximately )

Juice of half a Lemon

½ teaspoon freshly grated Nutmeg

120 gr Self Raising Flour

100 gr Caster Sugar

75 gr Butter


Optional

40 gr Rolled Oats

40 gr Demerara Sugar


Preheat your oven to 200 C / 400 F/ Gas 6. Wash the apples, peel and cut them into quarters. Remove the cores and slice each piece of apple in two. Put the apple pieces into a medium sized, heavy bottomed pan with the apple and lemon juice and cook over a low heat for about five minutes, until the apples start to soften. I like the apples to start to break up leaving some bigger pieces for texture. Taste the apples for sweetness, sprinkle with sugar as required and carefully stir in. Add the nutmeg and gently stir again. Transfer the apple mixture to a shallow ovenproof dish.

In a bowl blend the flour and butter together by rubbing with the tips of your fingers until the mixture looks like fine breadcrumbs, alternatively you can pulse together in a food processor for a few seconds. Blend in the caster sugar thoroughly ( at this point stir in the oats and the brown sugar if required ) and then loosely sprinkle the mix over the cooked apples in the dish. Place the crumble in the oven to bake for thirty minutes or until crunchy and golden-brown on top.

Serve with custard, cream or ice cream.

Beef and Vegetable Pasties

It’s cold outside and you probably want something hearty to eat, worry no more I have the perfect recipe for the weekend before you indulge in all that rich Christmas food, from a few years back from when I lived and worked in Cornwall. On a journey through the southwest when you leave cuddly, cosy Devon and its world famous cream teas, scones piled high with clotted cream and jam*, you cross the Tamar river and enter another world. There is something different about Cornwall and it always has been so, it is a magical place, a mythical place, slightly out of step and even out of time with the rest of England. It is a land with a rich history, it was a stronghold of the Celtic resistance to the Roman invasion, Phoenician traders travelled across the seas, over five hundred years ago, to bargain for the tin mined from its stony ground. It is a land of rolling, bleak moors, secret coves and bays hiding smugglers and pirates. Tintagel Castle, birthplace of the once and future King Arthur clings to its rugged coast. Cornwall is the land of the pasty.

pasty-4While I lived in Cornwall I made more than a few pasties culminating in a Bank Holiday weekend festival of pasties, real ale, music and more than a little mayhem at the New Inn, Tresco. People watched live bands, drank numerous pints of real ale and scrumpy in the Beer Festival Pavilion and ate pasties, ate pasties and ate more pasties. In fact, I’m pretty sure it could be a world record we sold thousands of pasties from producers all over Cornwall with some very unusual fillings. Peaches and Cream, Lamb Biryani, the Full English Breakfast Pasty ( grandma would approve ** ) to name just a few. I developed quite an aversion to the pasty but now I am slowly recovering.

So before I upset every Cornish man, woman and child with my totally unauthentic recipe I really ought to mention how it should be made. One of the first references to a meat pasty was made by the thirteenth-century chronicler Matthew Paris ( not the modern Times columnist although I’m sure he could make a mean pasty should he wish ) writing about the diet of the monks of St. Albans. The pasty often filled with venison was a delicacy and is mentioned by Jane Seymour, wife of King Henry VIII and the diarist Samuel Pepys.

As the popularity of the pasty waned nationally the Cornish pasty came into its own. The pasty was a popular filling dish to carry into the deep pits of the Cornish tin mines in the seventh and eighteenth century, wrap in thick pastry and muslin cloth the filling would keep warm for several hours. The pasty was often divided with meat the potato then fruit fillings. The thick twist of pastry was to allow the miners with dirty hands a convenient way to hold the pasty and was then discarded. There may be some truth that this also prevented contamination with the poisonous arsenic present in the tin mines.

A proper pasty is considered to contain beef, sliced potato, onion, and swede. Confusingly in Cornwall, a swede is called a turnip. I am not sure what they call Norwegians. The ingredients are sealed in the pastry with plenty of black pepper and cooked from raw. The Cornish pasty is protected under European law alongside Champagne and Parmesan cheese so the Cornish are right to be proud of their culinary heritage. Here is my recipe for the unauthentic but still quite tasty pasty. If you are Cornish I apologise.


*Always in Devon cream first and jam on top, in Cornwall the jam goes on the scone, it’s best not to ask wars are started over less.

** It is a little known fact all grandmothers don’t think you can get through the day without a hearty full English breakfast inside you. This is no bad thing


Beef and Vegetable Pasties makes 6 – 8

1 block of readymade Puff Pastry

Look I know we have not even got to the filling and I am using puff pastry and that is sacrilege, frozen puff pastry is a godsend to all but the most dedicated of cooks and always delivers a good finished result and they are very tasty I promise and I have apologised already.


500 gr Chuck Steak, cut in small chunks ( ask your butcher if you’re a bit unsure )

1 large White Onion, peeled and sliced

1 medium Swede, peeled and sliced about  ½ cm thick

4 Carrots, peeled and sliced

2 large Baking Potatoes, washed, peeled and sliced twice as thick as the swede

50 gr Button Mushrooms, wiped and thinly sliced ( optional )

A knob of butter

A glug of quality Olive Oil

30 gr Plain Flour

300 ml good Beef Stock

Worcestershire sauce

Sea Salt and freshly ground Black Pepper


Flour for dusting

Egg wash


Preheat the oven to 200C / 400F / Gas 6. In a large heavy-bottomed pan heat the oil and butter over a medium heat and add the onion and sauté for five minutes. Seal the meat, flour and plenty of black pepper into a plastic bag and shake well. When the meat is coated add to the pan. Stir and add the carrots, swede, mushrooms and stock. Bring to the boil and simmer for ten minutes stirring occasionally. Add the swede and a good slug of Worcestershire sauce. Cook for a further fifteen minutes until the potatoes are just soft. Check seasoning and set aside to cool.

Flour a clean work surface and roll out pastry to between a quarter and one-eighth of an inch thick. Using a plate cut out circles around six to seven inches in diameter. With a soft pastry brush egg wash one side of the circle. Spoon on a generous amount of filling and pull over pastry.

pasty-2
Crimp together the edges between finger and thumb to seal the pasty and place on a baking tray covered in parchment or with a silicon mat. Continue until all of the filling is used up.

pasty-3

Chill in the refrigerator for twenty minutes to relax the pastry then brush twice with the egg wash. Prick once with the tip of a sharp knife to let out the steam and place in oven. Bake for twenty minutes until golden brown and serve.

A Bonfire Night Treat – Roasted Red Pepper Soup

Early Autumn is one of my favourite culinary times of the year, root vegetables are becoming abundant, it is the season for game, hearty stews and fiery curries and it is when soups really come into their own. As the expected cold spell descends from the Artic just in time for Bonfire Night I thought I would pass one of our family favourite recipes. There is nothing as comforting after walking on the beach or kicking up some leaves up in the park with the children as a nice bowl of soup.

red-pepper-soup

We love creamy chowder, spicy sweet potato with cumin and chilli but in my house the girls love roasted red pepper best. This is a really easy, comforting recipe that freezes exceeding well so could be made in advance, it is a fantastic thick tasty potage full of sweet, smoky flavours and great served in a mug as you stand to watch the fireworks. Passed through a sieve it can be dressed up as a lovely lunchtime treat or simple supper dish. So for the perfect fifth of November feast make sure you have some crisp-skinned jacket potatoes freshly baked in the oven, a plate full of toffee apples for the children and a big, big pan of this delicious soup.

Roasted Red Pepper Soup            serves 4 to 6

2 large deep Red Peppers, halved & de-seeded.

1 large Onion, peeled and sliced

3 cloves of Garlic, peeled.

2 sticks of Celery, washed and thinly sliced

1 large Carrot, peeled and thinly sliced

2 x 400 gr tins of chopped Tomatoes

1/2 litre of Vegetable Stock

100 ml quality Olive Oil

50 gr Tomato Purée

1 heaped teaspoon dried Basil

1 teaspoon Smoked Paprika

Juice of one fresh Lemon

A generous pinch of dried Chilli flakes

Sea Salt and freshly ground Black Pepper

Pre-heat your oven to 200 C /  360 F / Gas Mark 4. Place the pepper halves and garlic cloves on to a baking tray and drizzle with a little of the olive oil. Bake at the top of your oven for thirty minutes until the vegetables are roasted and nicely caramelised. In the meantime, heat the remaining oil in a large heavy-bottomed pan, over a medium heat, and sauté the chopped up onion, carrot and celery for about ten minutes until soft.

In a second pan heat up the vegetable stock and add the tomato purée and the chilli flakes. Whisk and then add to the onions, celery and carrots. Peel any very dark, burnt spots from the peppers and add them, the garlic and remaining ingredients to the stock and vegetables. Bring the soup to a low boil, turn down the heat and simmer for twenty to twenty-five minutes.

Remove from heat and allow to completely cool then using a hand blender or food processor blitz the until the soup is smooth. You can pass the soup through a sieve if you want a more refined dinner party finish. To serve, reheat and season with salt, pepper and lemon to taste.


Stir-fry Beef in Black Bean Sauce

So you may have guessed from a previous article I love Chinese food. When I fly from the Channel Islands to the mainland it is difficult as I want to try every new restaurant, well that is a bit of an exaggeration my waist line is bad enough as it is, but I always hanker for a fantastic Chinese extravaganza, and that is always a rather greedy feast I am afraid. My absolute favourite was I recall eating a delicious Chinese meal in Oakham, Rutland, see I once lived and worked geographically about as far from the sea as you can get in England. In particular, one dish, crispy chilli beef served in a deep-fried potato nest was fantastic, it was from over fifteen years ago however, so I cannot guarantee that the restaurant even exists now, just a fabulous memory.

Next I crave the moist, oh so flavoursome steamed scallop wantons and prawn and pork dumplings from Hakkasan in Hanway Place, London, for which I would almost give anything to learn how to make, and is cooking at it’s best. Finally I would have an awesome crab with ginger and scallions ( Spring onions fellow English readers ), in East Harbor, New York, with a mind blowing Chinese and Japanese menu.  It is rather sad that I have yet had the opportunity to go to China but it is on my list to do, perhaps one day.

What I have done was an inspiring course in London with Ken Hom, equipped myself with numerous books, woks, steamers and ingredients from quaint little Asian speciality suppliers and set to work as only a chef can and chopped, pounded, crushed, fried and ate my way through the Chinese canon. Cantonese, Shandong, Hunan and spicy Szechaun cuisine with noodles, rice, black beans, bok choi and lots of seasoning; garlic, chilli, cloves and ginger, and the wonderfully pungent star anise. Am I giving my little local take away a bit of a run for his money what do you think? Enjoy.

My Top Tip Add splashes of water or vegetable stock occasionally while stir frying – this aids with steam-cooking the vegetables and prevents sticking.

chinese-meal

Beef in Black Bean Sauce                                                                                                           serves 4

750 gr quality Rump Steak

2 Carrots, peeled and cut into thin strips or julienne

2 large Onions, Peeled and cut into thin slices

1 Green Pepper, cut into slices

1 Red Pepper, cut into slices

75 ml neutral Oil for stir frying

50 gr Fermented Black Beans

3 Cloves of Garlic, peeled and finely chopped

3 cm piece of Ginger, peeled and finely grated

1 small Red Chilli, seeds removed and very finely sliced

1 tablespoon quality Toasted Sesame Oil


For the marinade

3 tablespoons Dark Soy Sauce

3 tablespoons Rice Wine or Dry Sherry

¼ teaspoon Chinese Five Spice

1 Clove of Garlic, peeled and finely chopped

2 teaspoons Corn Flour, mixed with a little cold water


For the sauce

100 ml quality beef Stock

1 tablespoon Caster Sugar

1 tablespoon Corn Flour, mixed with a little cold water

2 Cloves

Place the rump steak in the freezer for thirty minutes, this firms up the beef making it easier to slice thinly. On a secure board slice the beef with a sharp kitchen knife into thin strips and place into a glass bowl. Add the marinade ingredients, mix well to combine together and fully cover the steak strips.

Cover and chill in the fridge for a minimum of two hours. Meanwhile, prepare the black beans by first rinsing thoroughly in cold water then soaking in fresh water for around half an hour, changing the water once. Drain thoroughly, chop finely and set aside.

When ready to cook, drain the meat from the marinade pouring any remaining marinade into a small, heavy bottomed pan. Add the sauce ingredients to the marinade and heat gently to thicken, stirring occasionally to prevent lumps forming. Heat the oil in the wok until smoking and carefully add the meat. Stir fry until cooked, remove with a slotted spoon and set aside on to some kitchen paper.

Heat a little more oil then stir fry onion over medium heat for five minutes before adding the carrots and peppers, continue cooking for a couple more minutes until they are just starting to go soft. Add the black beans and cook for two more minutes stirring continuously, be careful not to burn, then add the garlic, ginger and chilli and cook for a further two minutes. Return the beef to the wok, strain the sauce through a fine sieve and add as well. Mix in the sesame oil and cook for one more minute stirring all the time to heat the beef through and serve immediately with egg fried rice or noodles.

National BBQ Week

Barbecue Diplomacy and the Most Important BBQ That Never Was – A Recipe for Walter Jetton’s BBQ Sauce

The culinary aware reader will know we are in the middle of National BBQ Week, you knew that didn’t you? I learnt that there is a National Hotdog Council over in America yesterday, so it really is never too late to learn and with that in mind I thought I would write a little about Lyndon B. Johnson. By nineteen sixty-three Lyndon B. Johnson had risen above the hurly-burly politics of the Lone star state to be vice president of the United States in the administration of the meteoric John F Kennedy. In a government of outstanding personalities including the president’s charismatic brother the attorney general, secretary of defense Robert McNamara and secretary of state Dean Rusk many saw Johnson’s role as mere window dressing. Yet this homely former school teacher established himself with quiet determination and pioneered what became known as barbecue diplomacy. As people relaxed due to the informal atmosphere of a barbecue around a pit or grill it was often easier for LBJ to talk business than in the rigid formal settings of a state banquette. My apologies as this is definitely an apolitical blog we need to talk more about the barbecue and not the man.

LBJ Photo.jpg

At his home on the banks of the Perdernale river, LBJ hosted an array of important barbecues for VIP dignitaries and most of these were catered for by Walter Jettson. He ran a local, well for Texas, catering company in Fort Worth and prepared the food at the LBJ ranch. On November 23, 1963 the staff of the ranch and Jettson were preparing for the biggest event of their lives the president was to visit and eat smoked ribs and brisket. As we all know he was never to make it. LBJ was sworn in as the thirty-sixth president of the United States on board Air force One carrying the body of President Kennedy back to Washington. Jettson was to become the President’s Pitmaster * and LBJ even flew him around the country to cater at political rallies. On the back of his celebrity, Jetton published a barbecue cookbook, which is unfortunately out of print but available on Amazon and other retailers.

Jetton catered for the first barbecue at the White House and continued to do so during LBJ’s term in office. When he decided not to stand for re-election LBJ hosted one last farewell barbecue on the White House lawns for over two hundred friends and supporters. The Texas style ribs must have been quite special as the Swiss-born, formally trained, White House head chef Henry Haller, wrote in his The White House Family Cookbook, ” He did a terrific job and I was most impressed with the results. His barbecue sauce avoided all of the common flaws (over sweetening, overcooking, excessive thinning) and by serving the sauce separately, he also avoided drying out the meat. ”

*Pit Master : An experienced barbecue cook, a skilled craftsman, who watches over the pit and can tell by sight, sound, smell, and touch, if it is running too hot or too cold, when it needs fuel, when to add wood, when to add sauce, and when the meat is ready.

For more information on Barbecuing visit www.joyofgrilling.com/glossary/

Here is my only slightly amended version of Walter Jetton’s recipe. As the full recipe is of authentic American origin it is measured in cups. A cup is between 200 and 250ml, providing one standard cup is used the proportions will work.

Walter Jettons’s BBQ Sauce

1 1/2 cups Water

1 cup Ketchup

1/2 cup Cider Vinegar

3 Stalks Celery, washed and chopped

1/4 cup Butter

1/4 cup Worcestershire Sauce

1/2 cup Onion, peeled and finely chopped

3 Bay Leaves

1 Large Clove Garlic, peeled and minced

½ tablespoon Sugar

1 teaspoon Chilli Powder

1 teaspoon Smoked Paprika

1/8 teaspoon Sea Salt

pinch of freshly ground Black Pepper

Mix all ingredients together. Place in a heavy-bottomed saucepan and bring to a boil and simmer for ½ an hour. Remove from heat and strain.

Walter Jetton’s LBJ Barbecue Cookbook– By the Caterer to the LBJ Ranch, Written with Arthur Whitman, 1965, Pocket Books.

Poached Lobster

One of the joys of living on an island like Jersey is the seafood, I mean we have the Jersey Royal potato, fantastic vegetables but really it is all about the seafood and how. Faced with the choice of briny Royal Bay of Grouville oysters, plump sweet mussels fresh from the sea, fat diver caught scallops, where do I start? The undoubted stars of the seafood show are freshly caught crab and lobster. I waiver between them both sometimes favouring a big slice of rich crab tart or a hand-picked crab salad and at others a regal lobster supper. I’m kind of the side of lobster at the moment so I thought I would share how to prepare a delicious lobster.

Lobsters

In America, the Lobster is very often simply broiled ( grilled ) with oodles and oodles of butter on the side, to dip the succulent cooked lobster meat in, and it comes with a warning about Cardiac arrests. Equally popular is the fabulously addictive lobster roll with creamy mayonnaise and fresh dill. Around the world, the lobster, when treated with care, stir-fried, grilled and baked in amazing recipes is a seafood sensation. There are, however, still a certain class of restaurant where only a small number of ways to serve lobster are contemplated, in the classic sauces Newburg, American and Thermidor. Each of these blockbuster, in-your-face recipes in the right hands can be an amazing dining experience but they can be much maligned. I am at heart a big fan of enjoying the delicate flavour of lobster as unadorned as possible and simply poached.

Poached Lobster.docx

This, however, is not a simple matter, the purist would have you boil the lobster in sea water, this is not always easy or even safe. The alternative is fresh water with added sea salt (add 25 gr of natural sea salt per litre of water). My own choice is in a court bullion which is an ideal cooking medium for poaching fish, seafood and chicken. I have adapted my recipe from Richard Onley’s, ‘The French Menu Cookbook’, a recently reprinted classic and thoroughly good read. If you cannot get your hands on a Jersey lobster I thoroughly recommend Cornish as a great alternative.


For 1 or 2 750 gr / 1 kg Lobsters

4 Litres of cold Water

1 Large glass White Wine

3 Large Shallots, peeled and chopped

1 Medium Stick of Celery, chopped

1 Medium Carrot, peeled and chopped

White of 1 Leek, thoroughly washed and sliced

½ Bulb of Fennel, washed and sliced

1 Bay Leaf

1 Sprig fresh Thyme

1 Sprig Tarragon

8-10 fresh Parsley Stems

½ teaspoon Black Peppercorns, crushed

1 Lemon, halved


Place all the ingredients in a very, very large pan, cover and bring to the boil. Add the lobsters and bring back to the boil and simmer for eight to ten minutes. Using a spider remove the lobsters and plunge in lots of iced water to arrest any further cooking.

Today’s top tip is when poaching lobsters place them in your freezer ten minutes prior to cooking, this will sedate the lobsters sufficiently to allow you easily drop them in your boiling pan without the lobsters thrashing about and splashing you with scolding hot liquid.

Remove the lobsters and set aside to drain. Place a chopping board on a damp kitchen cloth to prevent it from slipping. Place the lobster on the board and hold firmly by the tail. Find the cross on top of the lobsters back and using a large cooks knife cut through the shell towards the head. Turn the lobster around to then cut through the tail.

Cutting a cooked Lobster

The slushy material in the head cavity can be washed out and the shells thoroughly washed. Along the tail meat is a small dark tube, through which the lobster removes waste. Carefully pick out the tube. Reverse the tails by taking them out and placing in the opposite shell. Then using a cleaned board, you can break out the claw meat. Using a fine crochet hook or lobster pick remove the two smaller pieces of lobster. Holding the tip of the claw tightly between finger and thumb crack open the claw using the flat back edge of a large cook’s knife.


Remove the rubber band and pull down on the smaller claw, it will come off pulling with a small transparent membrane. This allows you to remove the lobster claw meat. Fill the empty head cavity with the picked lobster meat. You can serve the lobster with the claw in the cracked shell if you wish, or simply halved with a lobster claw and pick.

The Perfect Burger

A quick look at the weather forecast confirms that I have not mistaken a rise in the UESW Index*, if as expected we do have a mini heat wave then it is time to brush off the barbecue and go get out the gas fired grill. Speed to your shed or garage and send the spiders spinning and check the charcoal. I get excited about barbecuing pretty much anything but today is all about the burger. The burger has become a much-maligned meal when it has the true potential for mouth-watering, meaty magnificence. Our supermarket freezers are stuffed with mechanically extracted, pulverised, ground and additive enhanced excuses and many of the massive chain restaurants serve products that are little better. If you intend to barbecue ( or grill if you must ) please, please, please have a go at making some yourself.

Char grilled BurgersAt the heart of every burger is the meat to fat ratio, when selecting your cuts of meat to mince, you ideally want to achieve around 85% lean meat. The fat is very important to your finished burger, much of the flavour comes from the fat during cooking and is responsible for the correct mouthfeel of the finished product. The fat moistens the burger as it cooks but much of the fat will drain off onto your barbecue. If you cook too close to the coals this is when you get flaring as the fat ignites. Less than 15% fat and your burger will be dry, much more and your burger will shrink drastically during cooking. The finished burger will only be, a not unhealthy 5% fat so fear not if you are trying to diet, it is better for you than you think, positively rocking paleo speaking. You can ask your butcher for advice on which cuts to use but a fifty/ fifty split of ground chuck and ground sirloin will achieve outstanding results.

If you ask you butcher for advice he can help you with the next stage and mince your beef for you. You want to get a coarse grind. Too fine and the mixture is sloppy and the end result can be like rubber. You want to avoid working the meat as much as possible, your butcher will grind the beef in an industrial mincer which will process the beef quicker than a small handheld mincer. Many commercial burgers included numerous other ingredients but I like to keep it simple with just sea salt and plenty of freshly ground black pepper. If you do want to add other ingredients, an onion is just about acceptable, dice them very, very finely. Anything over the finest dice and the added ingredients will not cook and the minced beef will not hold together leaving you with burger pieces on the grill.

If your butcher prepares your mince for you, chill it for a couple of hours before you prepare the actual burgers. Keeping your seasoned burger mince cold by placing it in a bowl, in another bowl packed with ice, will result in a much better burger and help ensure a safe hygienic production. You could purchase a burger press if you are going to barbecue every weekend but it is just as easy to shape a medium sized handful into a ball then lightly pat it flat. Run some cold water over your hands to keep them cool before you shape your burgers and try to work them as gently and as little as possible. Over handling bruises the meat and will result in a tough, dry burger. Cover a tray with cling film and place the completed burgers onto the film. Cover with more cling film and store in the refrigerator until cooking time

Fire up your clean barbecuBurgere and get the coals nice and hot so the grill heats up. Give the grill a good going over with a wire brush then very carefully give the bars a quick wipe of oil. The safest method is to sprinkle some vegetable oil on a thick fold of kitchen paper. Using barbecue tongues wipe the oiled paper over the grill to wipe off any remaining burnt fragments and charcoal dust. Once the barbecue is ready we can cook.

Brush the chilled burgers with a little olive oil to help prevent sticking and place on the grill. Quickly press down with your thumb in the centre of each burger to leave a slight indentation, as the meat cooks and the proteins contract and pull together this will stop the burger looking like a rugby ball, or for you Americans one shaped just like your footballs. Aim to leave around a third of your grill empty. You might think this is an underemployment of your glowing coals but if you do get flare ups you will have space to move your burgers and prevent them from burning. After three minutes give the burgers a ninety-degree turn ( that’s one quarter-turn ). If you think your burger is cooking too fast and it will burn just raise the grill one notch from the coals. Turning the burger will give the criss-cross appearance of char marks on your burger that will demonstrate your professional cooking skills. Do not be tempted to squash the burger with your spatula as this squeezes out the tasty melted fat leaving a dry burger.

After another two minutes, your burger is should be ready to flip, the edges will be browning and you might see pinkish pearls of moisture on the burger surface. As you develop your barbecue grilling skills you will learn the cooking times of different meats and cuts. You really only ever have to turn the burger over once let it cook for three more minutes and you can then check if it is ready. The cooking time is directly proportional to the thickness of your burger when it is ready any escaping juices will be clear and the internal temperature if you check it with a thermometer should be over 80C / 180F.

Place the cooked burgers on a warm plate, cover with foil and place to the side of the barbecue to keep warm and let them rest for a few minutes. Brush the cut sides of your burger rolls with a little melted butter and toast them over the coals. The rest is up to you, personally, I favour sliced pickles, crisp lettuce, and really ripe tomatoes and maybe a slice of Monterey Jack Cheese. Enjoy.

* Unexpected Early Short Wearing – the major exponent is my friend Steven but he is South African and cannot help it. 

Pan Fried Sea bass and Jersey Royal Potatoes

The Jersey Royal season is reaching a peak and around the island honesty boxes are full of bags of delicious potatoes. Bizarrely you will probably be able to buy them cheaper on the mainland due to the buying power of the supermarkets but I guess I can console myself with some very low food miles. I wrote last year about the history of the Jersey Royal and here is a very light and tasty way of serving up this year’s harvest. To keep it really local I am going to use some fresh line-caught Sea Bass, Jersey Dairy Salted Butter and island grown Vine Tomatoes.

A good fishmonger should be able to source your Sea Bass for you, as a cheaper alternative, you could do worse than take a look at Sea Bream as an alternative. A good local fishmonger with an ice tray full of fish and seafood, caught from our coastal waters, should be treasured. Along with your local butcher and greengrocer, he should be on the family Christmas card list, invited to weddings and treated as a valued friend.  Not only will he have an array of fish to tempt you but can provide advice and help prepare your lunch or dinner. This is an ideal recipe to be served as a delicious, but quick and simple to cook supper.

Sea Bass


Pan-fried Sea Bass with Jersey Royals                                                    serves 4


4 Medium Sea Bass fillets, pin boned and de-scaled

( Your fishmonger should do this for you )

500 gr Jersey Royal Potatoes

50 ml Good quality Olive Oil

25 gr Salted Butter

100 gr Vine Cherry or Baby Plum Tomatoes

1 small Red Onion, peeled and very finely chopped

2 Cloves of Garlic, peeled and very finely chopped

1 small Chilli, de-seeded and very finely chopped

Zest and Juice of 1 fresh Lime

A small handful of fresh Coriander Leaves

½ teaspoon Coriander seeds

½ teaspoon Caster Sugar

Sea Salt and freshly cracked Black Pepper


Prepare the Jersey Royal potatoes by washing in cold water, rubbing any dirt off with a cloth. Place in a pan of cold  lightly salted water and bring to the boil. Simmer for about ten minutes, depending on size until just cooked and they fall off the point of a small sharp knife. Place the pan under a cold tap and run until the potatoes are cold and the cooking process is arrested.

Halve the cherry tomatoes and place in a bowl with the onion and the chilli. Sprinkle with the sugar. Toast the coriander seeds in a small sauté pan over a moderate heat to release the essential oils and develop the flavour add a splash of olive oil and one clove of the garlic. Sauté for two minutes without burning either the garlic or the coriander, gently crush in a pestle or food processor and add to the bowl of tomatoes. Add the lime juice and zest and one fluid ounce of the olive oil, mix well and season then set aside.

Prepare the sea bass fillets by carefully scoring parallel lines just through the skin with a very sharp knife point. This will help prevent the fish from curling up in the pan during cooking. Generously season the fish fillets on both sides. Heat two medium sauté pans and divide the remaining butter and oil, when the butter is melted and starting to foam, add the potatoes to the first and the fish to the second. Place the fillets in the pan, one by one, skin side down and gently press down with your fingers in the centre of the fish for thirty seconds to ensure the middle of the fillet remains in contact with the pan.

Warm the potatoes through until the skins begin to slightly crisp then add the remaining garlic and plenty of salt and pepper. After the fish starts to turn from opaque to white and the skins are crisp and golden brown, around three to four minutes, turn over and finish flesh side down for a further two minutes. This process will depend on the size and thickness of your sea bass fillets and they may need a little longer.

Chop the fresh coriander and add to the salsa. Place hot, garlicky potatoes in a circle on a warm plate and fill the centre with salsa, the top with the cooked fish. Using a spoon decorate the edge of the plate with a little extra salsa including some of the liquor. For an extra special finish top with a deep fried prawn.


Optional

4 large King Prawns, peeled and de-veined

50 gr Plain Flour plus extra for dredging

A small bottle of cold Sparkling Water

Sea Salt and freshly cracked Black Pepper

2 pints of Vegetable Oil for Frying


Sieve the flour into a bowl and add a generous amount of salt and pepper. With a whisk, mixing continuously, add some sparkling to the flour until you have a smooth batter about the consistency of double cream. Place the batter in the fridge to rest for fifteen minutes. In a large, heavy-bottomed, pan heat the oil to 160°C / 320 F using a thermometer to check. If you do not have a thermometer have a few cubes of stale white bread to hand. Place a bread cube in the oil if it rises to the surface and cooks to a golden brown in a couple of minutes the oil is hot enough.

Take two teaspoons of flour and place in a shallow tray, season well. Dredge each prawn in the seasoned flour until covered. Shake off the excess flour and dip in the batter mix before carefully lowering into the hot oil. Fry the prawns for around four minutes or until the batter is crisp and golden, turning the prawns from time to time with a large slotted spoon. When the prawns are cooked remove using the spoon and drain on kitchen paper.