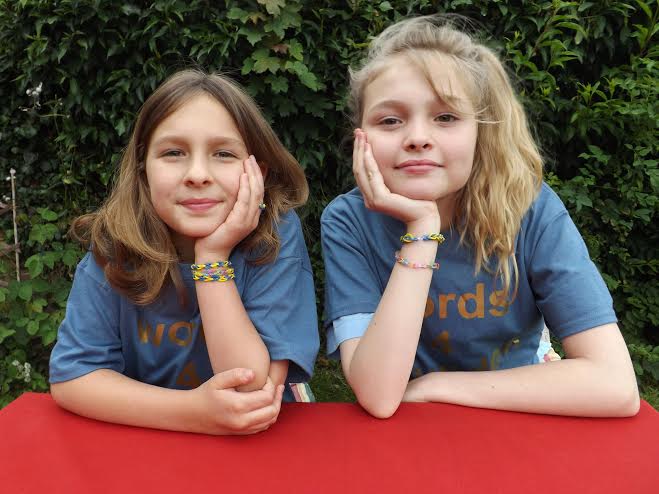
Our grandma, Margaret Graham, is an author and wanted to help wounded troops to recover. She started Words for the Wounded, which raises money with writing competitions, donations and events.
She has two other grannies who help, author Penny Deacon, and reader Janet Speedie. Another grannie, writer Tracy Baines helps sometimes, and our Uncle Matt does extreme sports to raise money for them, and Uncle Kris and his friend Lee did a Triathlon.
The grannies have just done a skydive with Auntie Annie. Next year they are white water rafting. Meg might too, if her back is strong enough after her operation. Auntie Kate does WforW social media and grandpa does the website.
Grandma sometimes says when she is tired and very busy doing her books for Random House, or teaching writing, ‘Why did I start this?’ We know why she did. We all want to help these very wounded young troops.
So we thought we’d make friendship bracelets that the grannies can sell at their events.
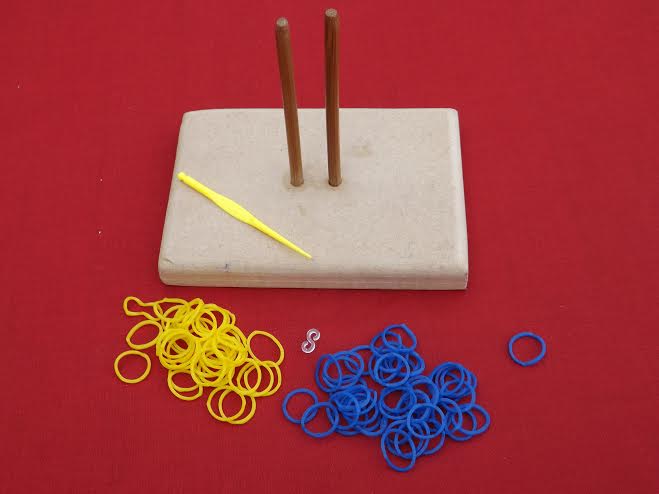
A. This is how we do it, using loom bands. These are available from The Works, Claire’s, and online. You need bands, a hook, a clasp, and a loom if you wish.
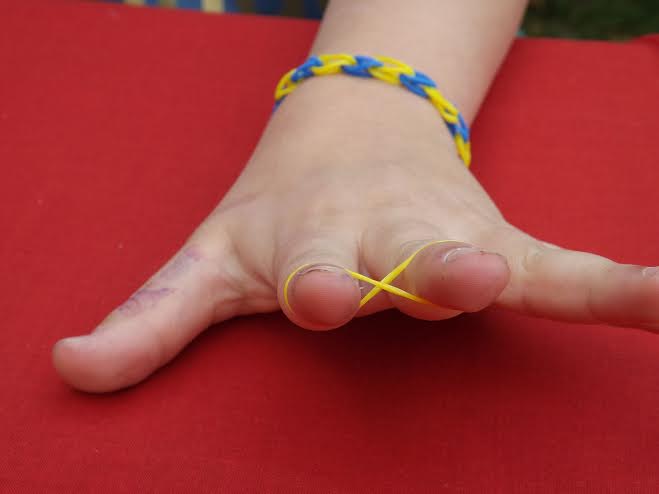
B. Josie is making a chain bracelet which you can make using your fingers. It has a loose link.

C. Start with two fingers and place the first band over them in a figure of 8. This is the only time you use an 8.
D. Place a 2nd band on top.
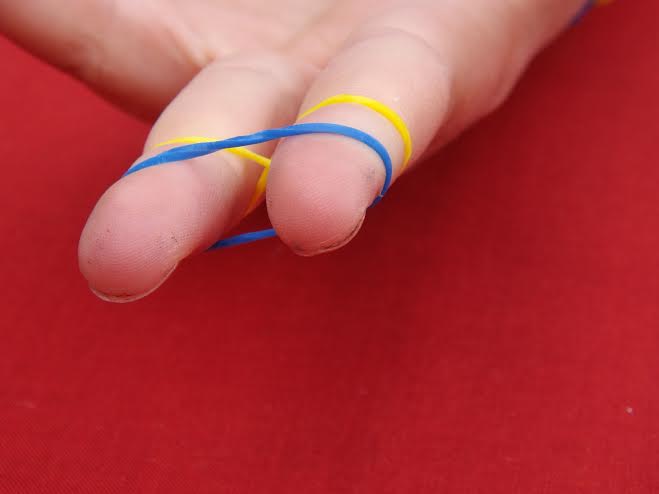
E. Use the hook to drag the bottom over top of left finger and release. Repeat with the right. Keep doing this until you have the length you want.

F. Take the left band from the finger and switch it to the right.
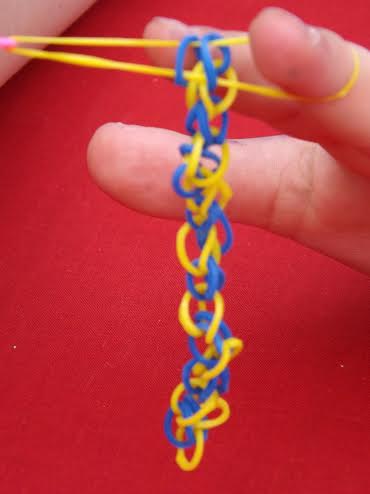
G. Loop the clasp through both ends of the band.
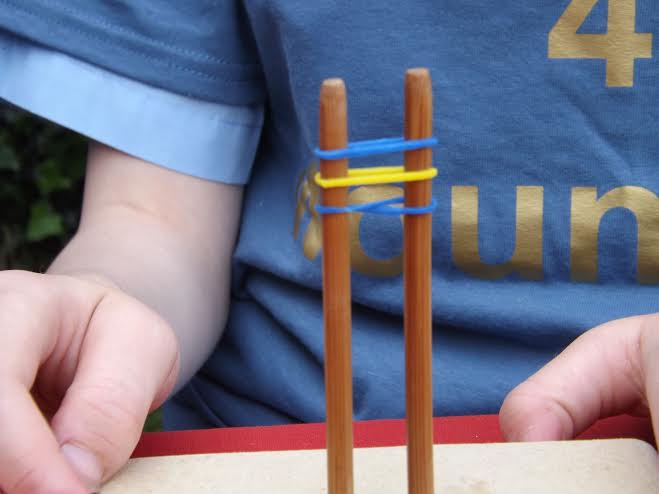
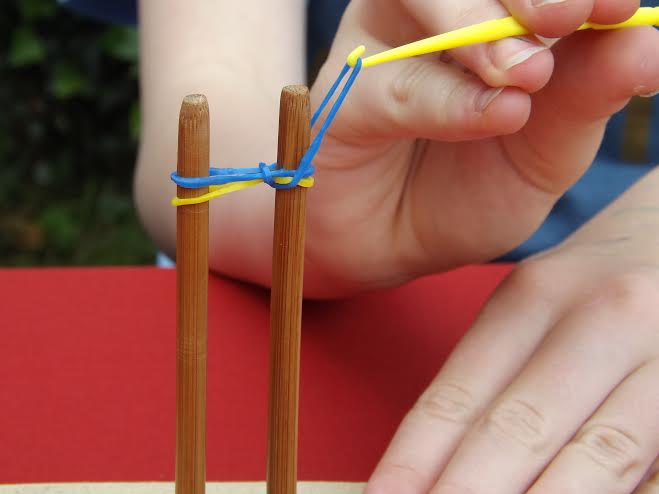
Megan is making a fishtail loom bracelet using a loom, not fingers. It has a tighter link. Grandpa made her look out of grandma’s wooden knitting needles. Grandma made a bit of a face, but only a bit.
1. Start by twisting a band in a figure of 8 round the two pegs. Add 2 more bands, using alternate colours.
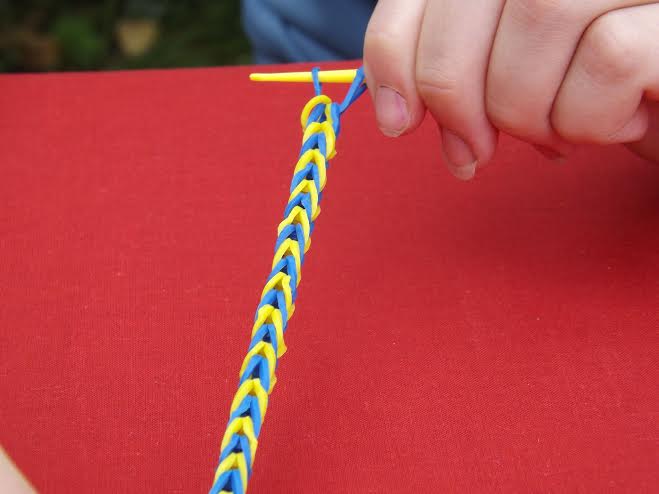
2. Use the hook to drag the left side of the band over the right hand peg. Repeat the same step with the right side band until it is the right length. You can make a template by measuring a child’s wrist, or an adult.Repeat the same step with the right side band until it is the right length. Measure it round a child’s wrist, or an adult. To complete: Stop adding bands but continue to use the hook to drag the bands over until you have one left.
3. Once there is only one band on the hook, lift the left side up but keep it on your hook. Then lift up the right and keep it on your hook. I use Josie to pull down the bracelet, then I feed a band through one side of remaining loop and then through the other side.
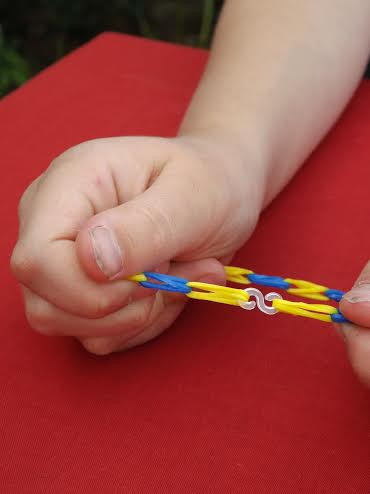
4. Then add a clasp like Josie did.
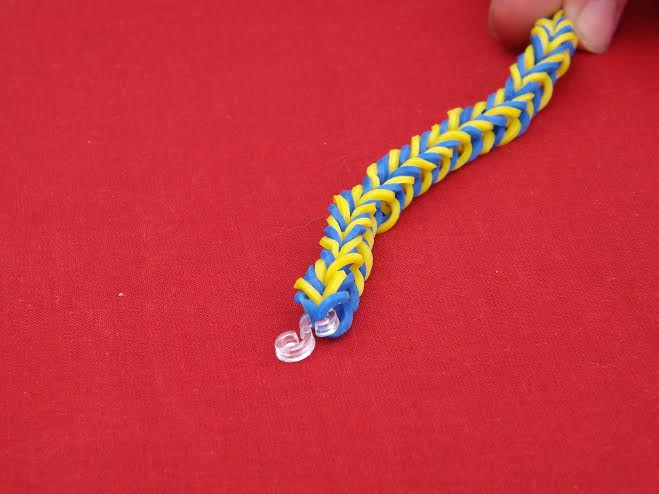
5. Here is the finished bracelet, stretched to show the clasp.
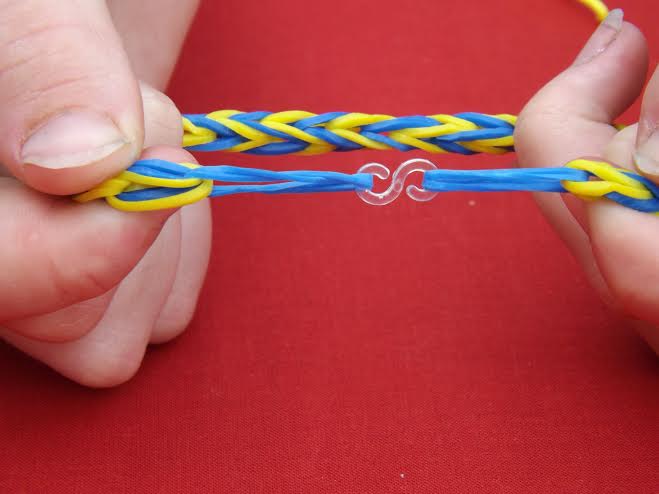
6. There are all sorts of colours you can use. There mood bands that change colour with your mood. We use blue and yellow for Words for the Wounded. If you want to know more about grandma’s charity, go to www.wordsforthewounded.co.uk None of the grannies take any money, so all the money they raise goes to the cause. Grandma does a blog: www.wordsforthewounded.blogspot.co.uk