Create a prettily embroidered lavender bag to pack away with your summer wardrobe with Maggie Robb of Made by Maggie
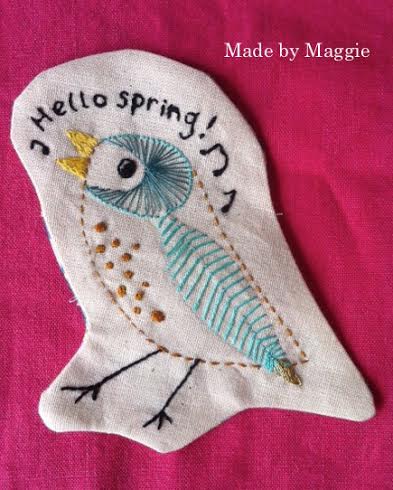
The seasons have certainly changed and it’s time put away summer clothes until next spring. What better way to keep your favourite frocks fresh and protected than with his cute little birdy lavender bag? The herbs inside not only give off a lovely scent, but will also guard against moths. And when you come to unpack everything next year, you’ll be greeted by a lovely upbeat message. Or, why not create your own designs or even personalize the message to make the bag for a friend.
To find out about downloading a template of this little bird, please visit https://www.facebook.com/MadebyMaggie07
You will need:
- Plain fabric to embroider your design onto. I used calico because I like its rustic feel
- Pretty backing fabric to match your embroidery
- Household baking parchment to trace your design
- Sharp pencil
- Embroidery threads in 2/3 different colours, black and a metallic thread, if you want a bit of sparkle
- Fairly sharp embroidery needle
- Scissors
- Embroidery hoop
Sharp needle, and cotton thread. A sewing machine will speed up the process but isn’t essential
- A mix of dried lavender and dried rice for the filling
- A little bit of toy stuffing

Step 1
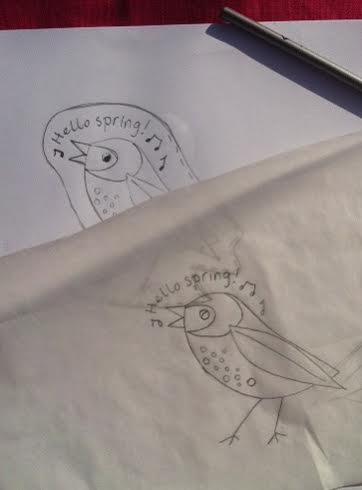
Choose your design or create your own. When you’re happy with it, place the parchment paper over the top and with a steady hand trace around the design using a sharp pencil.
Step 2
If your design includes text you will now have to turn your tracing over and using some scrap paper to rest on, trace your drawing from the opposite side. If you’re not using text, and don’t mind your image facing the opposite way, skip to Step 3!
Step 3
Turn over your tracing so that the pencil outline is face to face with your calico fabric. Making sure that you have a hard surface underneath your work as you will need to press quite hard, carefully trace over the design again. When you remove the parchment paper you should be left with a pencil outline of the design on the fabric.
Step 4
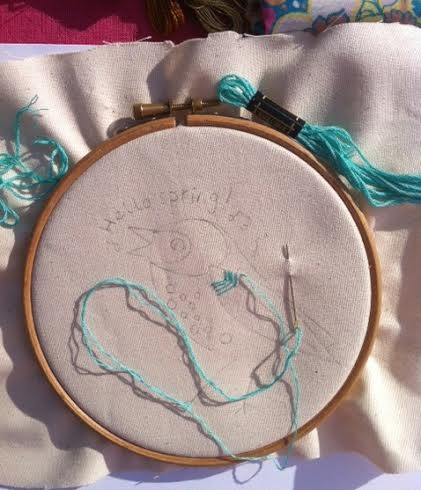
Now for the fun bit! Place your fabric into an embroidery hoop to keep it nice and taut. Select your first embroidery thread and separate the 6 strands so that you are working with just two together. Thread these through your sharp embroidery needle and get stitching! Use a variety of different stitches to add interest to your design. I’ve used satin stitch for the bird’s eye, beak, the spots on his chest and the metallic tips of his tail. Running stitch, backstitch and vine stitch (used on the legs) are great for outlining. And for the turquoise around the birds face I used just one strand of thread in long stitch. The feathers along his wing were done in my latest stitching discovery, Roman stitch. Find tutorials for all these and more on the internet.

Step 5
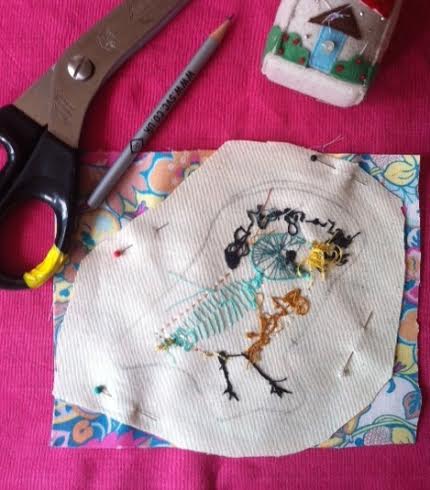
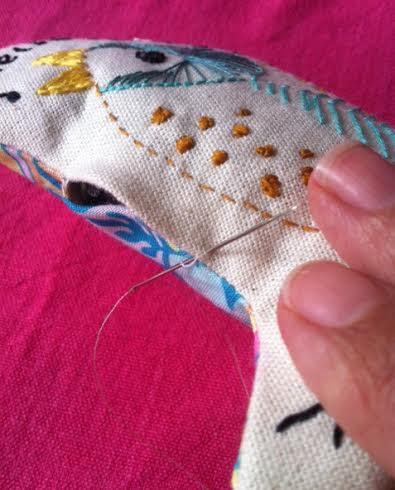
Remove your finished embroidery from the hoop and press with a hot iron. Sketch a rough pencil outline, about 1cm from the stitching ONTO THE BACK of the fabric, to act as a guide for sewing up. Now place the whole thing onto the top of your backing fabric, right sides together. Pin the two together and stitch around your outline leaving a 2 cm gap unstitched for turning.
Step 6
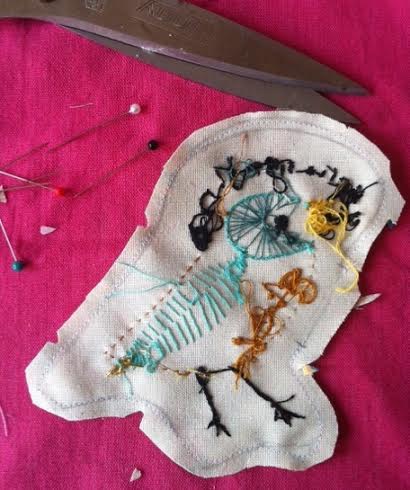
Trim your work to about 0.5cm from your stitching and with a sharp pair of scissors make some little nicks in the seam allowance so that when you turn it through the seam excess doesn’t bunch up or pull your birdy out of shape.
Step 7
Turn your work through and press with a hot iron. Now you can fill your little cushion with a mixture of lavender, dried rice and a little bit of toy stuffing too. The rice adds a satisfying sense of weight, but will also help the lavender to give off more scent by rubbing up against it when you give the bag a squeeze! The toy stuffing helps create a nice smooth finish.
Step 8
Using a needle and thread, hand-sew the gap closed. Your little scented friend is now ready to get to work. Nighty night little bird, see you in the spring!
For more lovely pretty things stitched by hand visit https://www.facebook.com/MadebyMaggie07